Connecting Microsoft apps to Zeta Alpha
Step-by-Step Instructions
1. Sign in to Microsoft Entra
Sign in to https://entra.microsoft.com/.
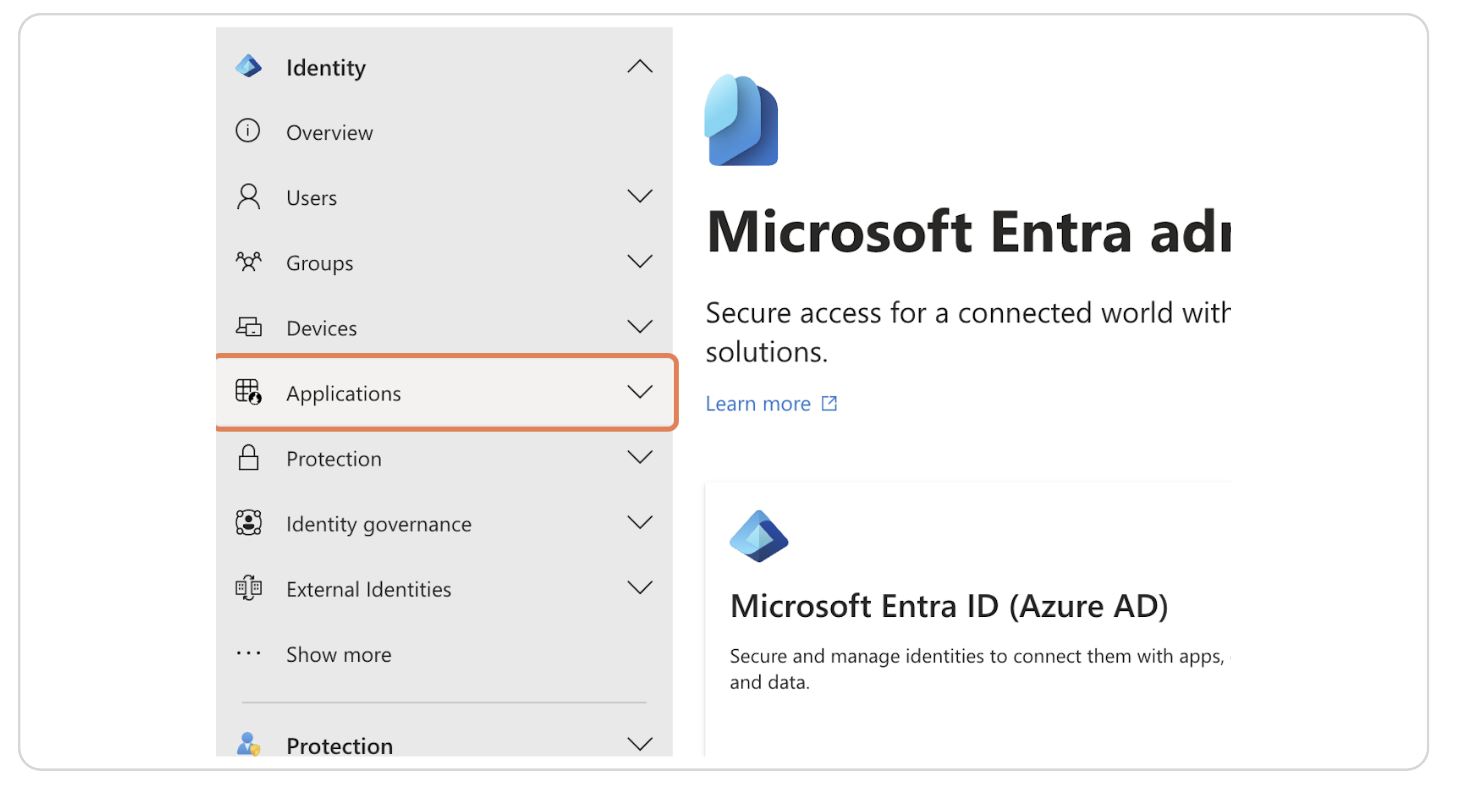
2. Click on Applications
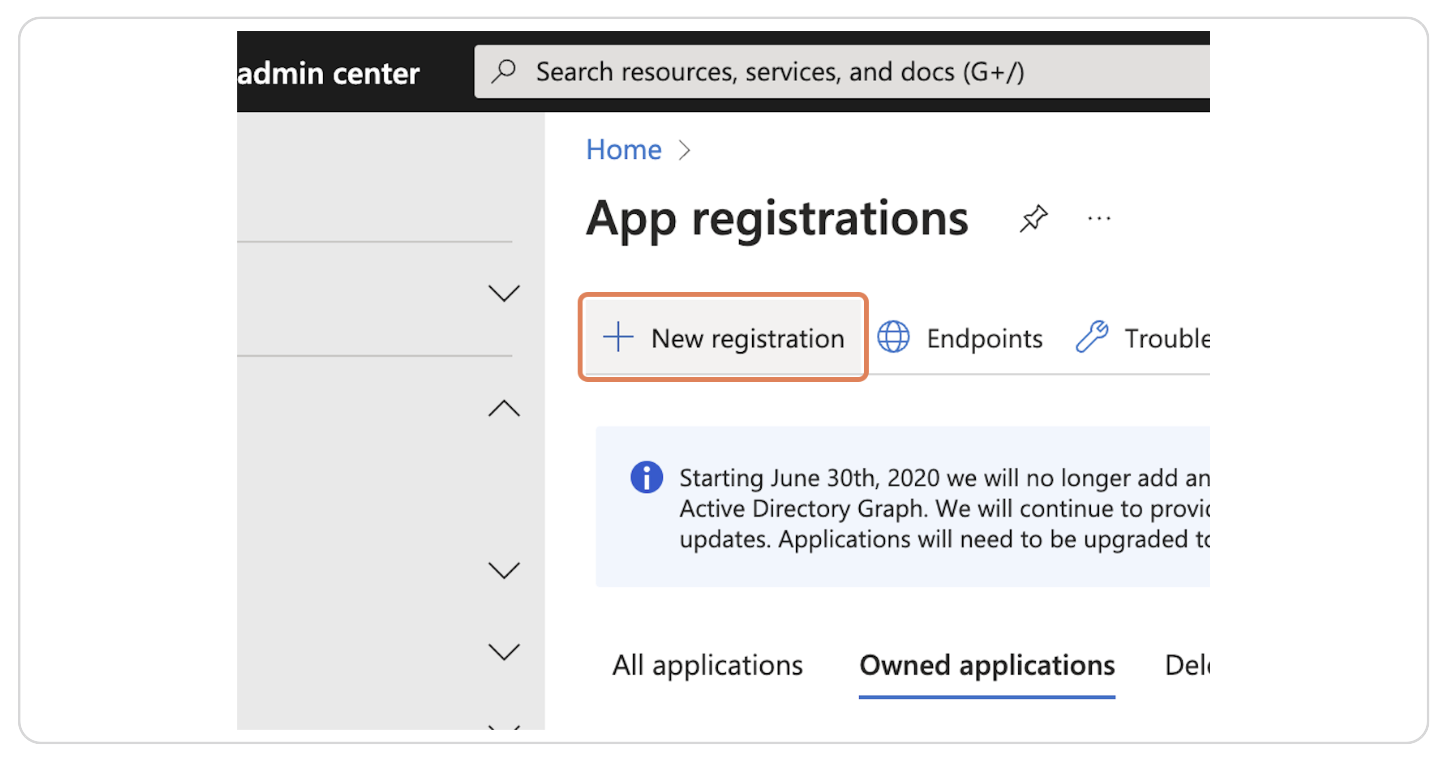
3. Click on App registrations
Go to the Invite users page by clicking the blue button in the top right corner.

4. Click on New registration
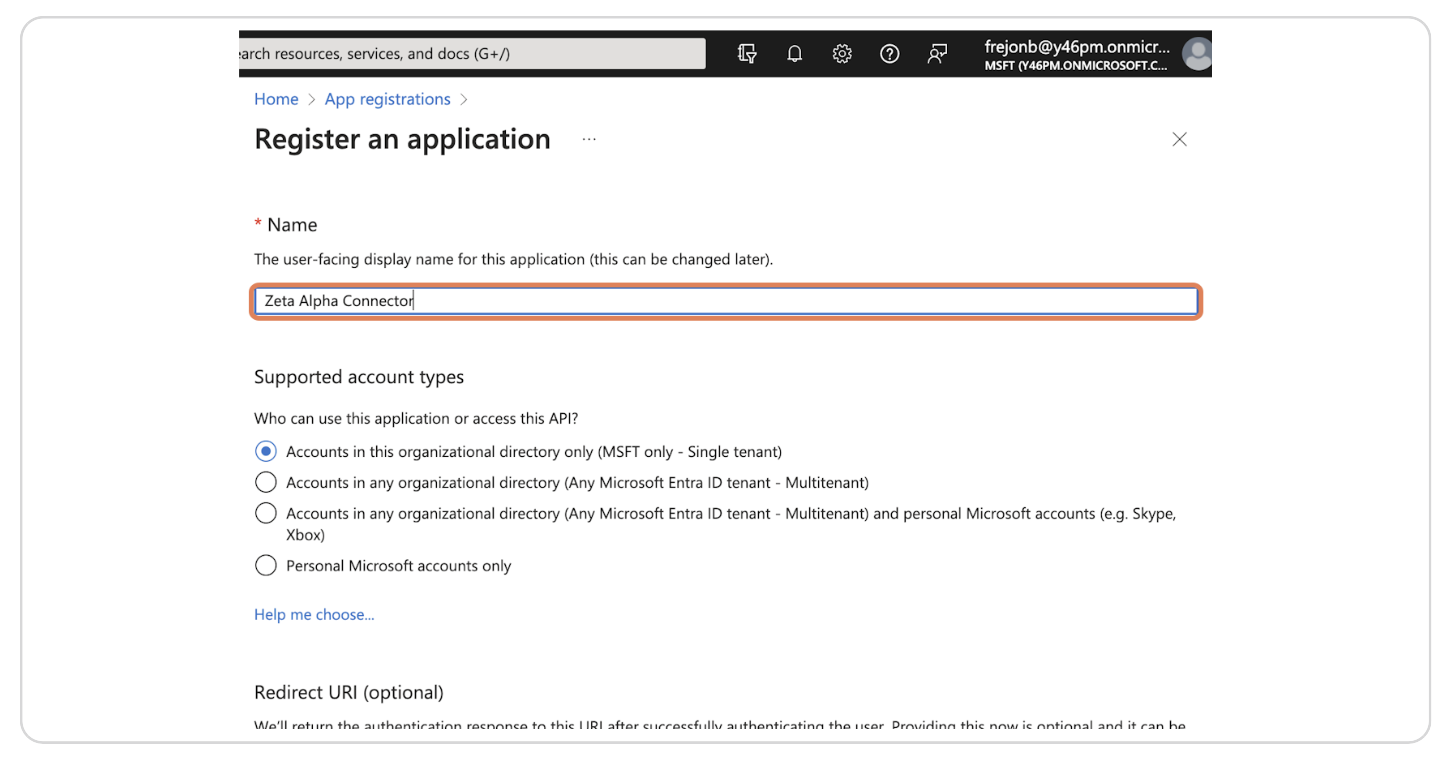
5. Enter the name of the application
For example "Zeta Alpha Connector"
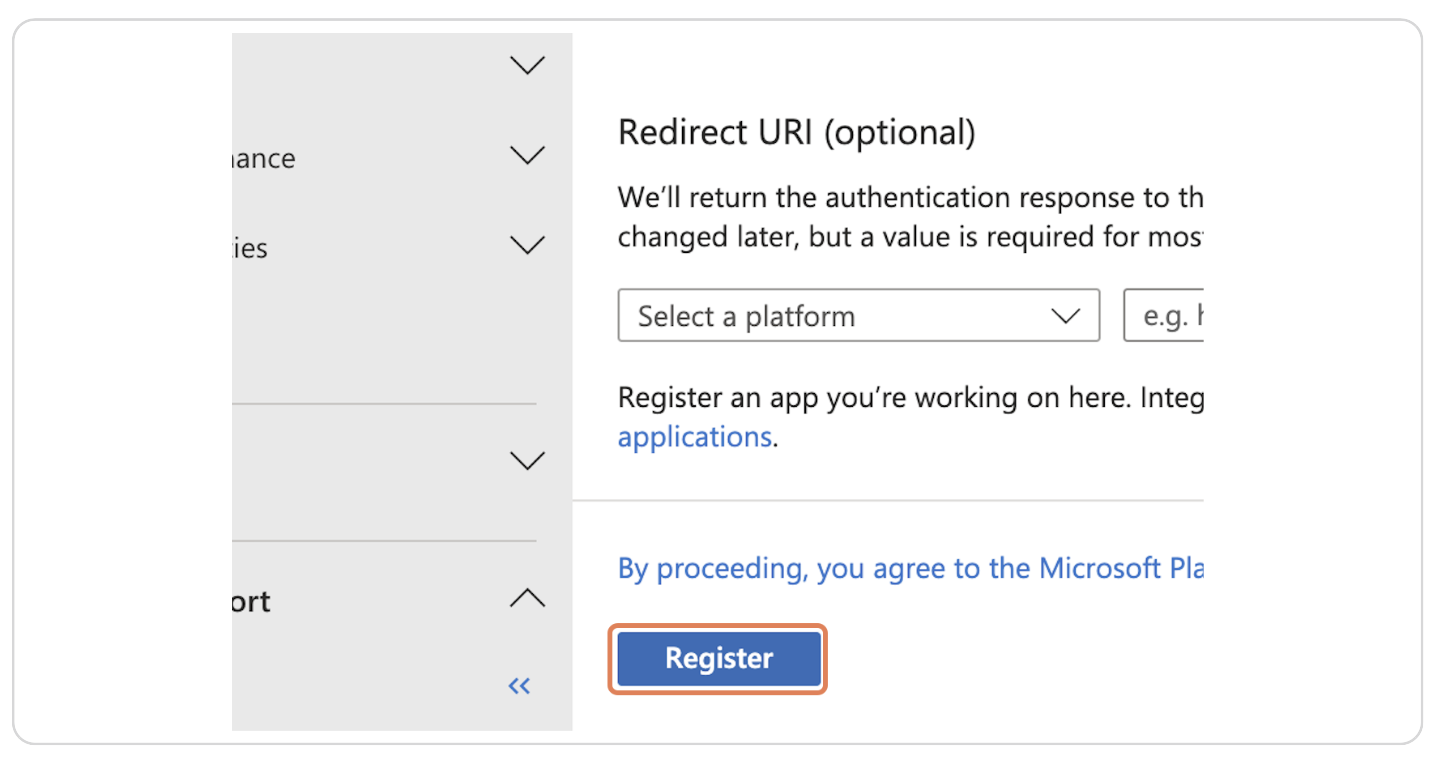
6. Click on Register
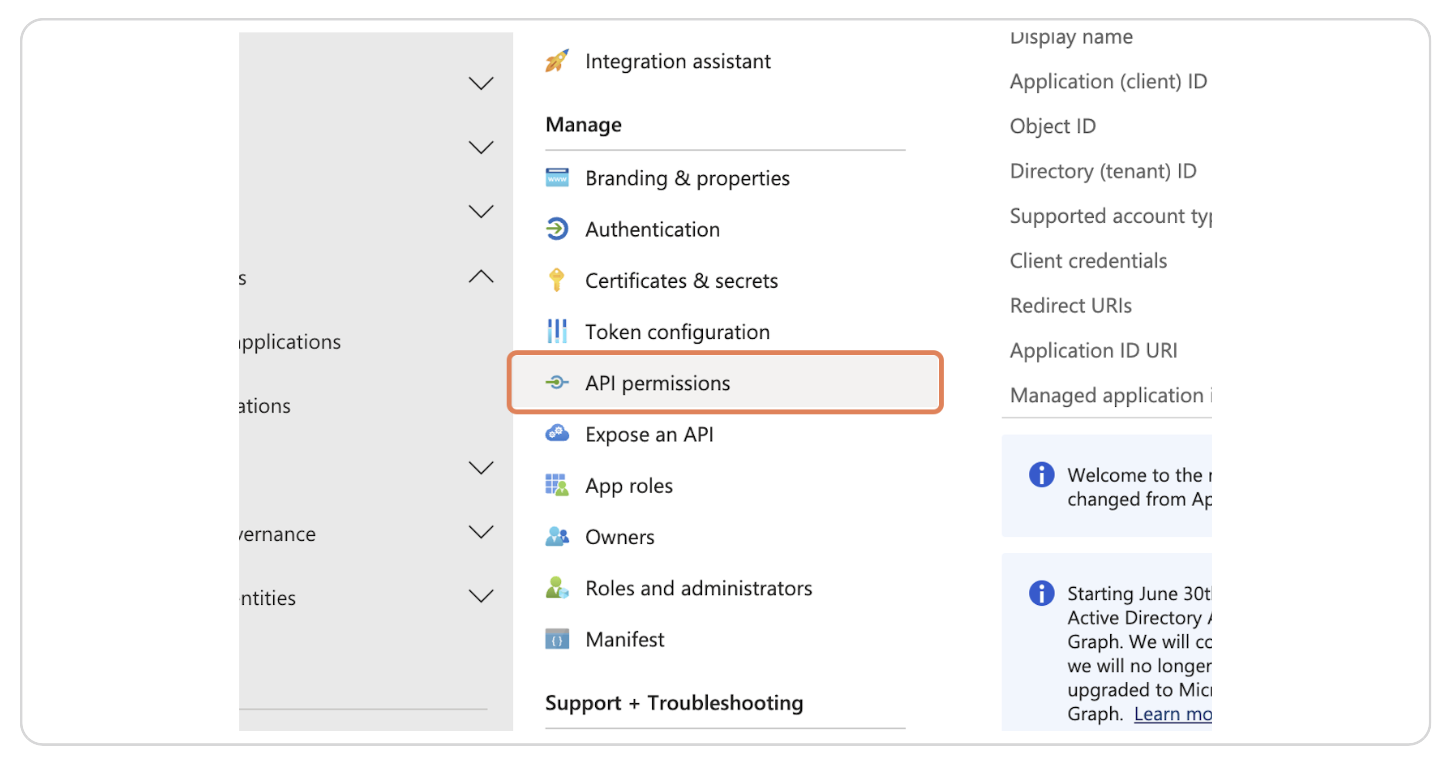
7. Click on API permissions
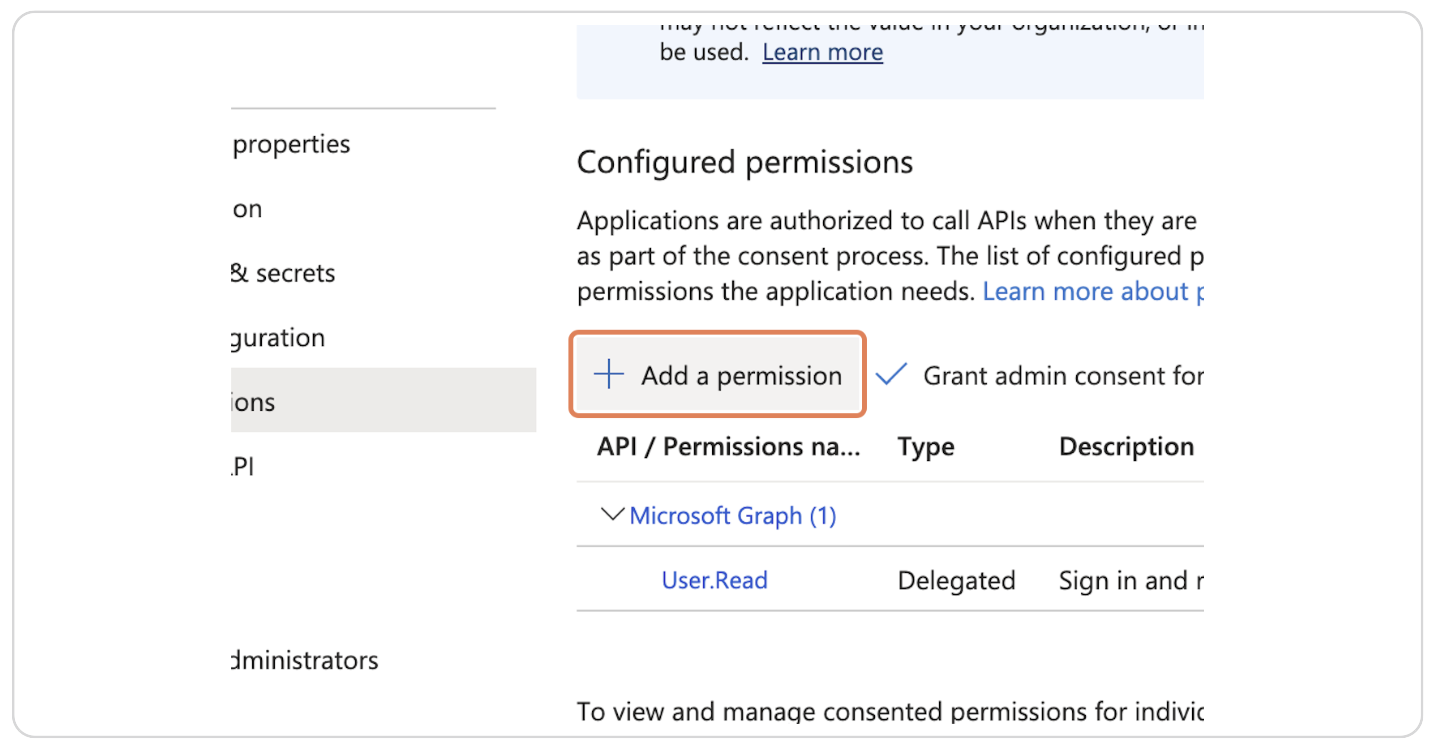
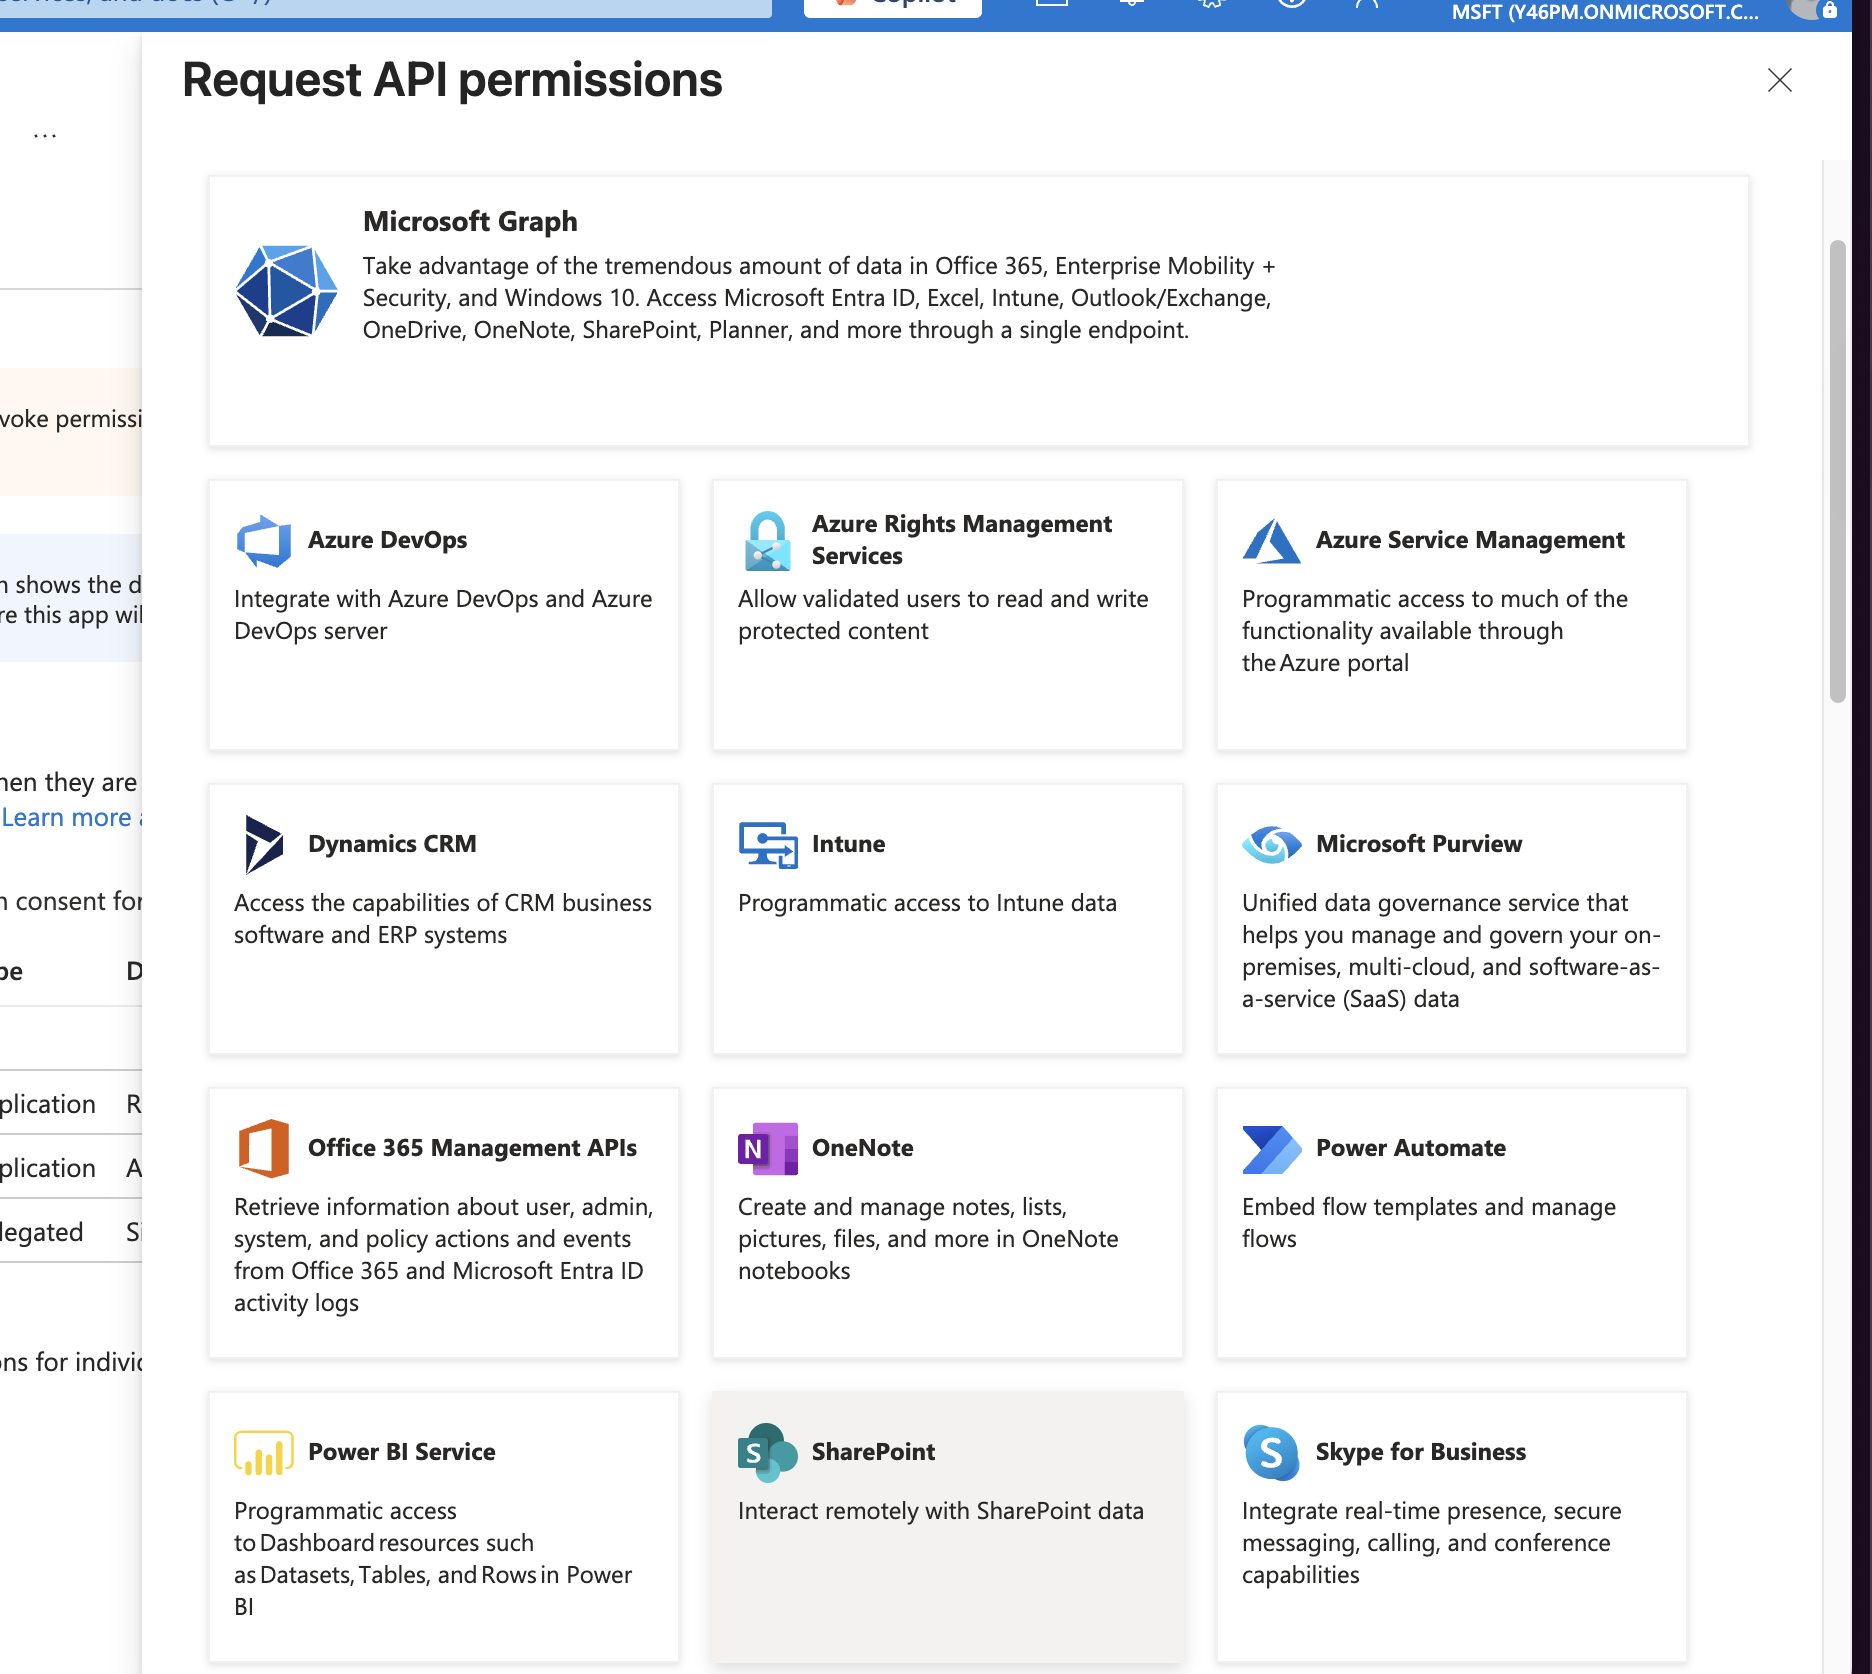
8. Click on Add a permission
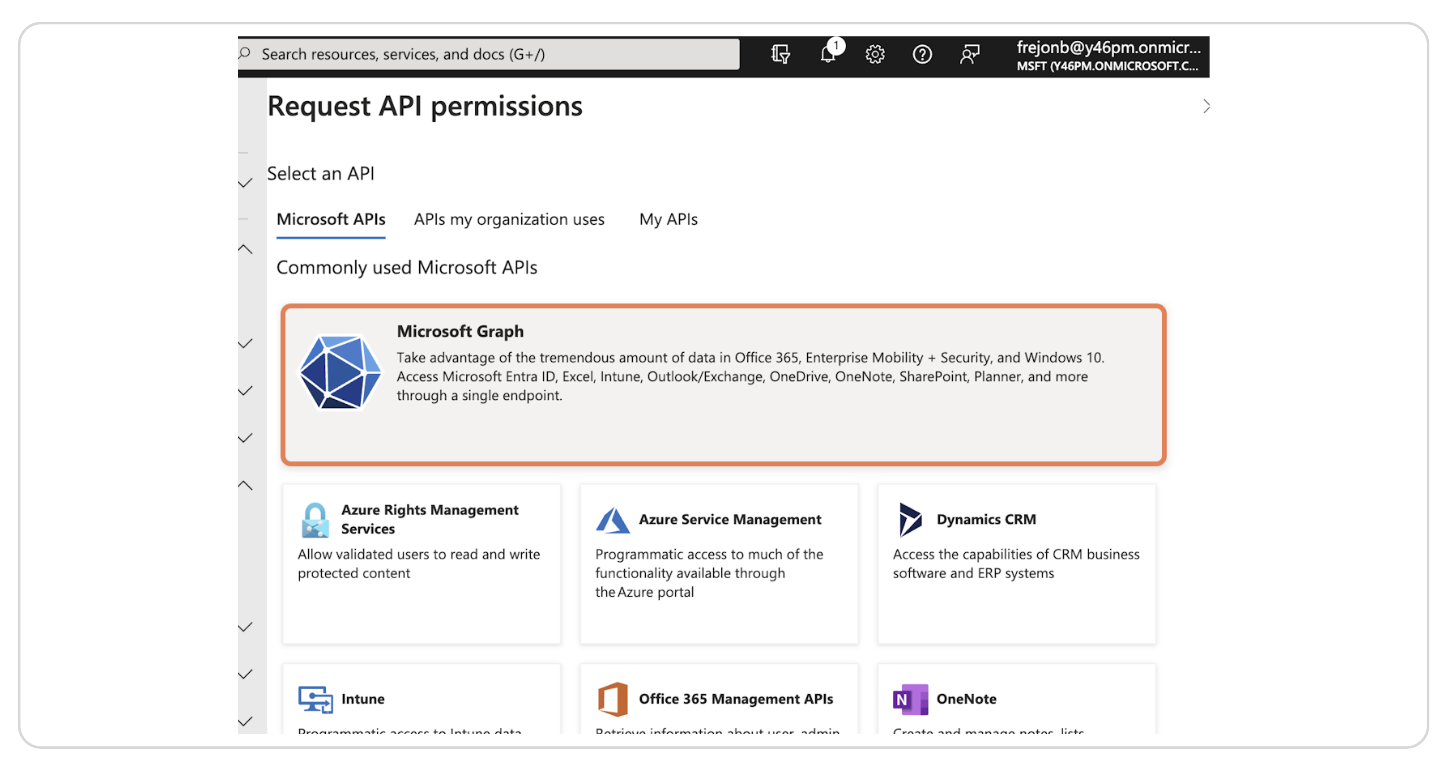
9. Click on Microsoft Graph
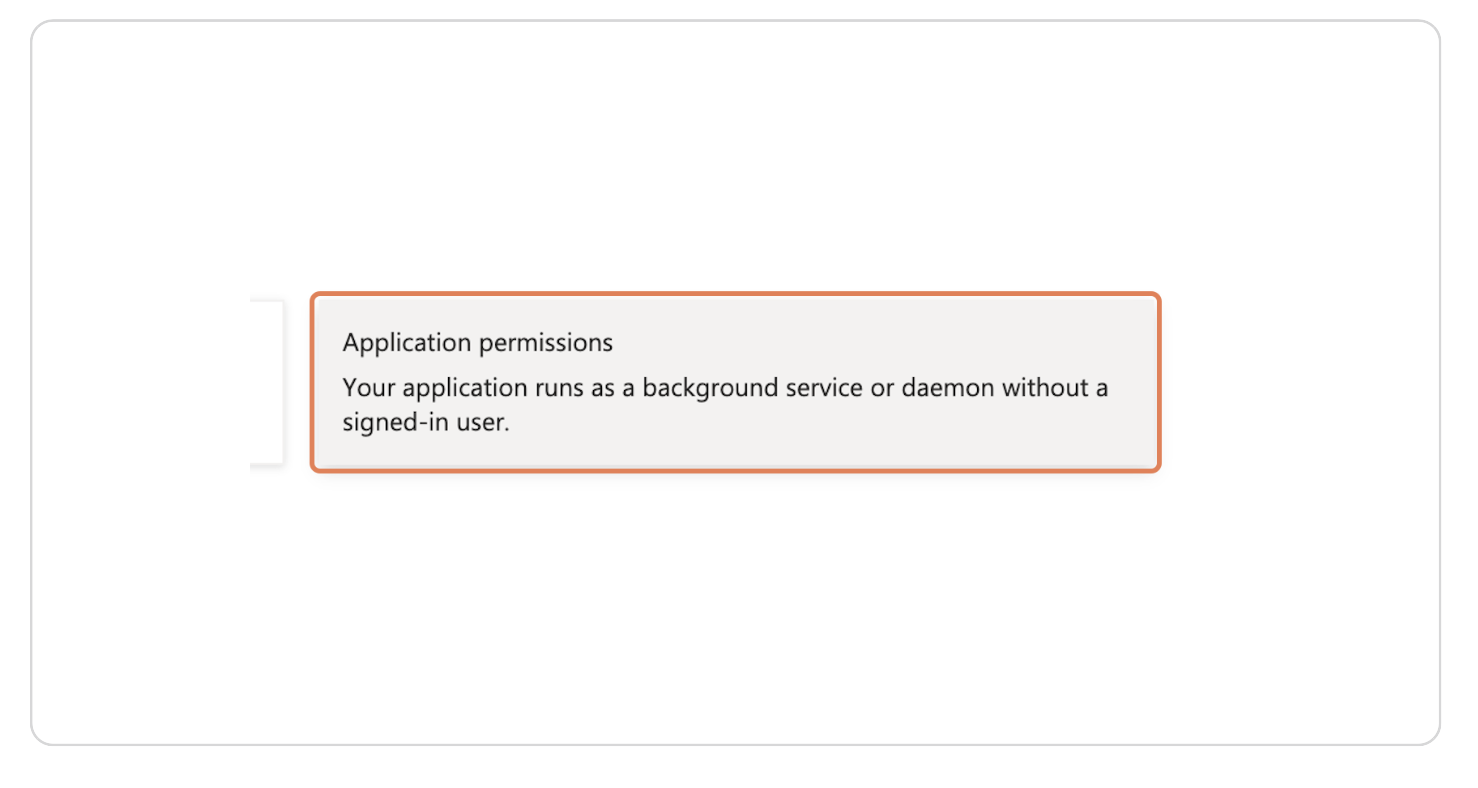
10. Click on Application permissions
11. Enter the permission name
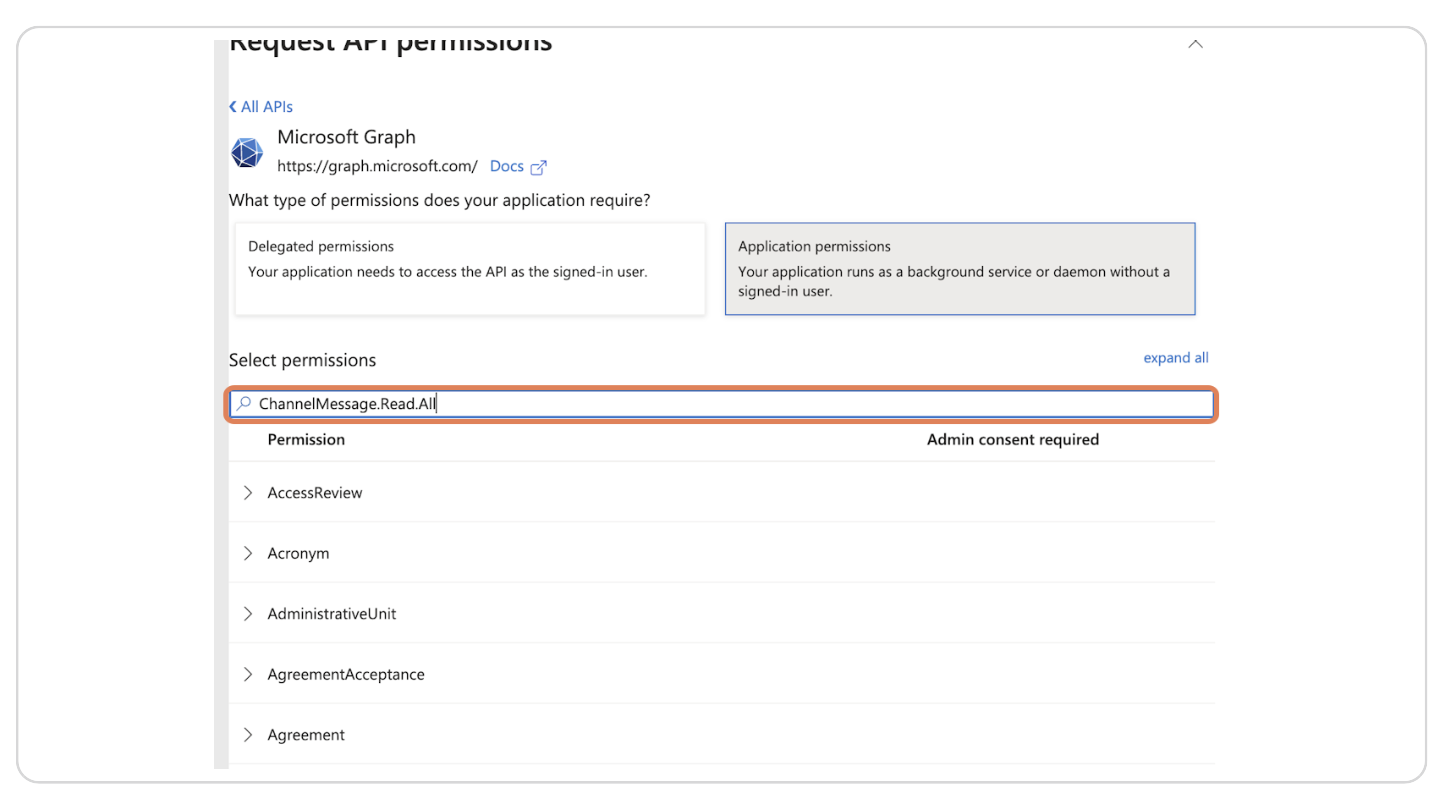
See the complete list of permissions at step 14.
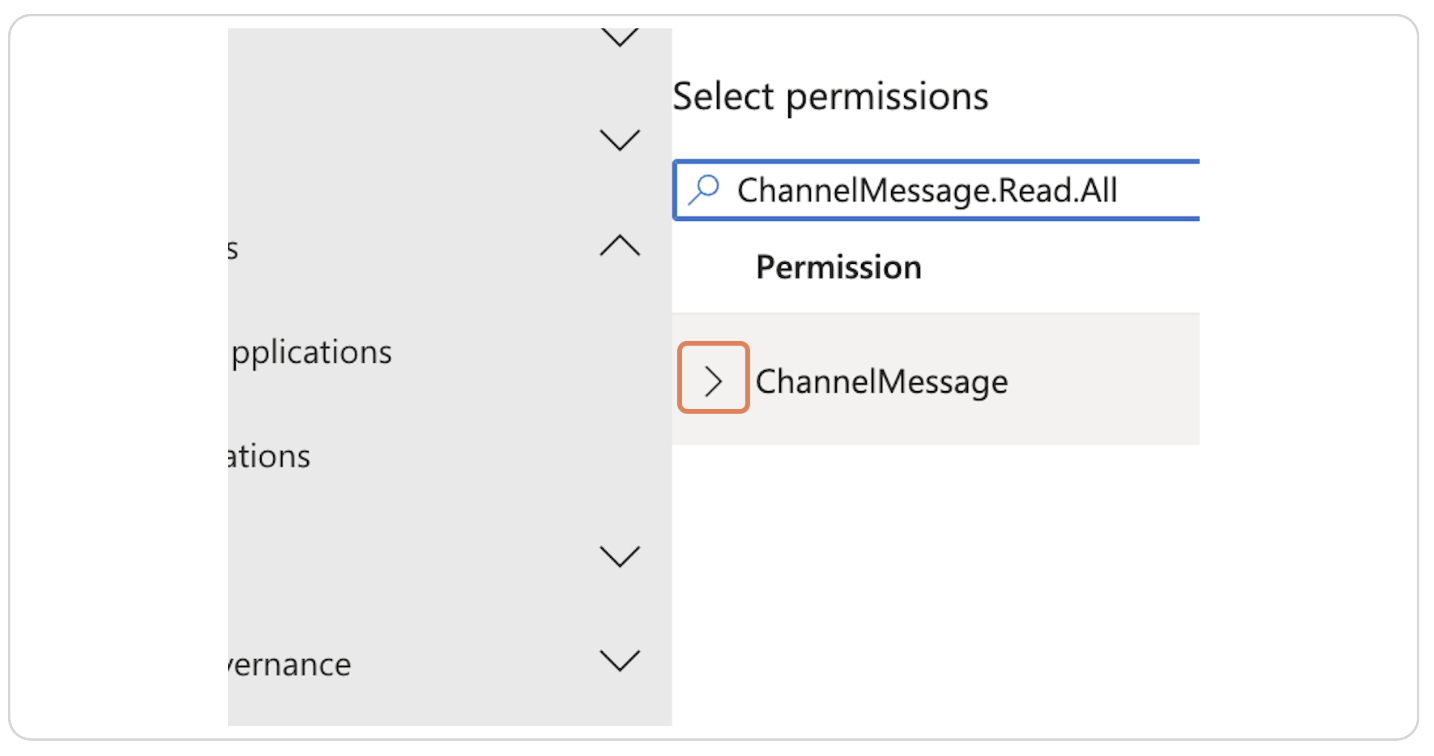
12. Click on Expand or collapse group
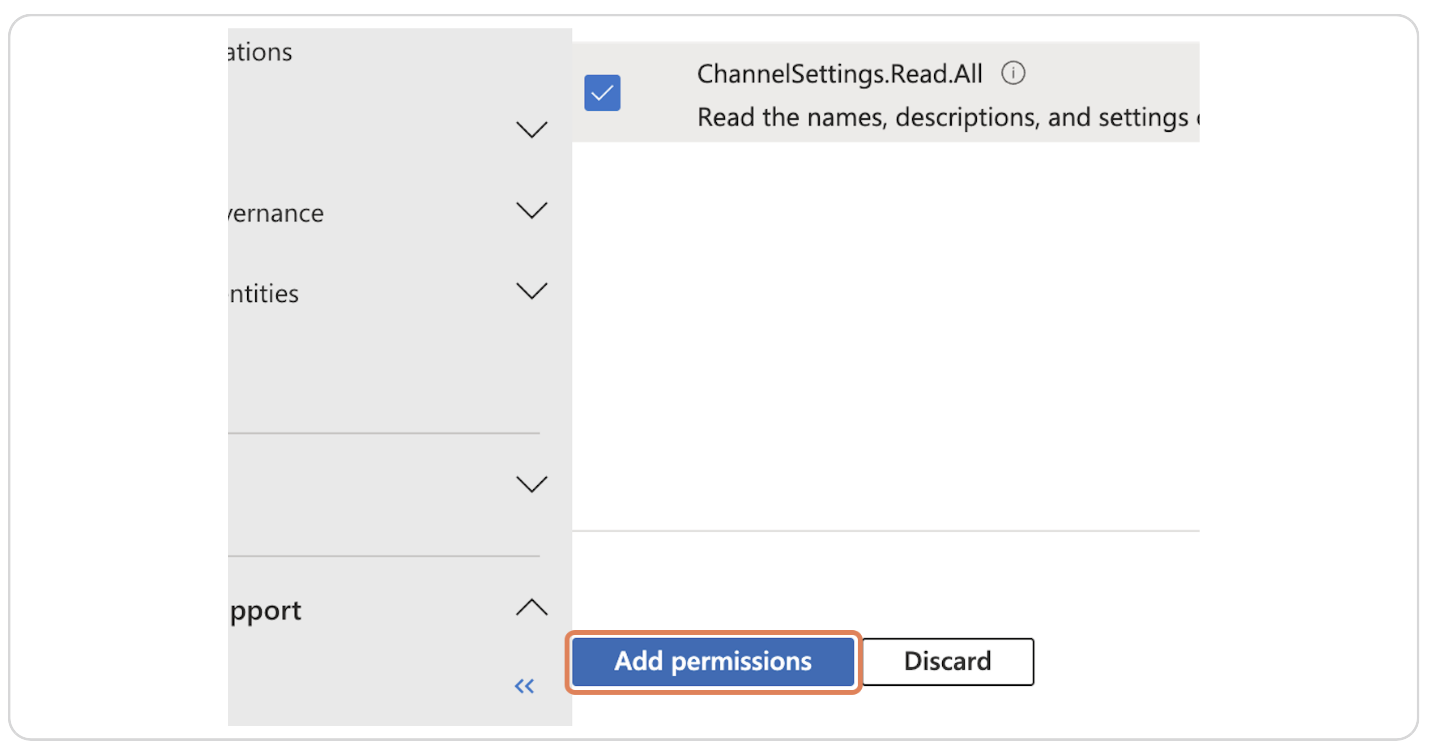
13. Click on the checkbox if not selected

14. Click on Add permissions
15. Add all required permissions by repeating steps 8-14 for each
In Zeta Alpha, we practice the principle of least privilege, unfortunately Microsoft Graph API minimum permissions scopes are excessive for only reading data. The following permissions are required for the Zeta Alpha applications in order to read data from Sharepoint, OneDrive and Teams:
ChannelMessage.Read.All
ChannelSettings.Read.All
Chat.Read.All
Team.ReadBasic.All
TeamMember.Read.All
User.Read.All
Files.Read.All
Sites.Read.All
Even though this permissions are broader for only reading data, Zeta Alpha will only read data that is explicitly allowed by the connector configuration.
Alternative: Add selected sites only
If you want to limit the access to selected SharePoint sites only, then the only permission to add is
Sites.Selected
Then, after creating the application, you need to grant access to the specific SharePoint sites that you want Zeta Alpha to crawl. Please refer to step 19 Grant access to specific sites below.
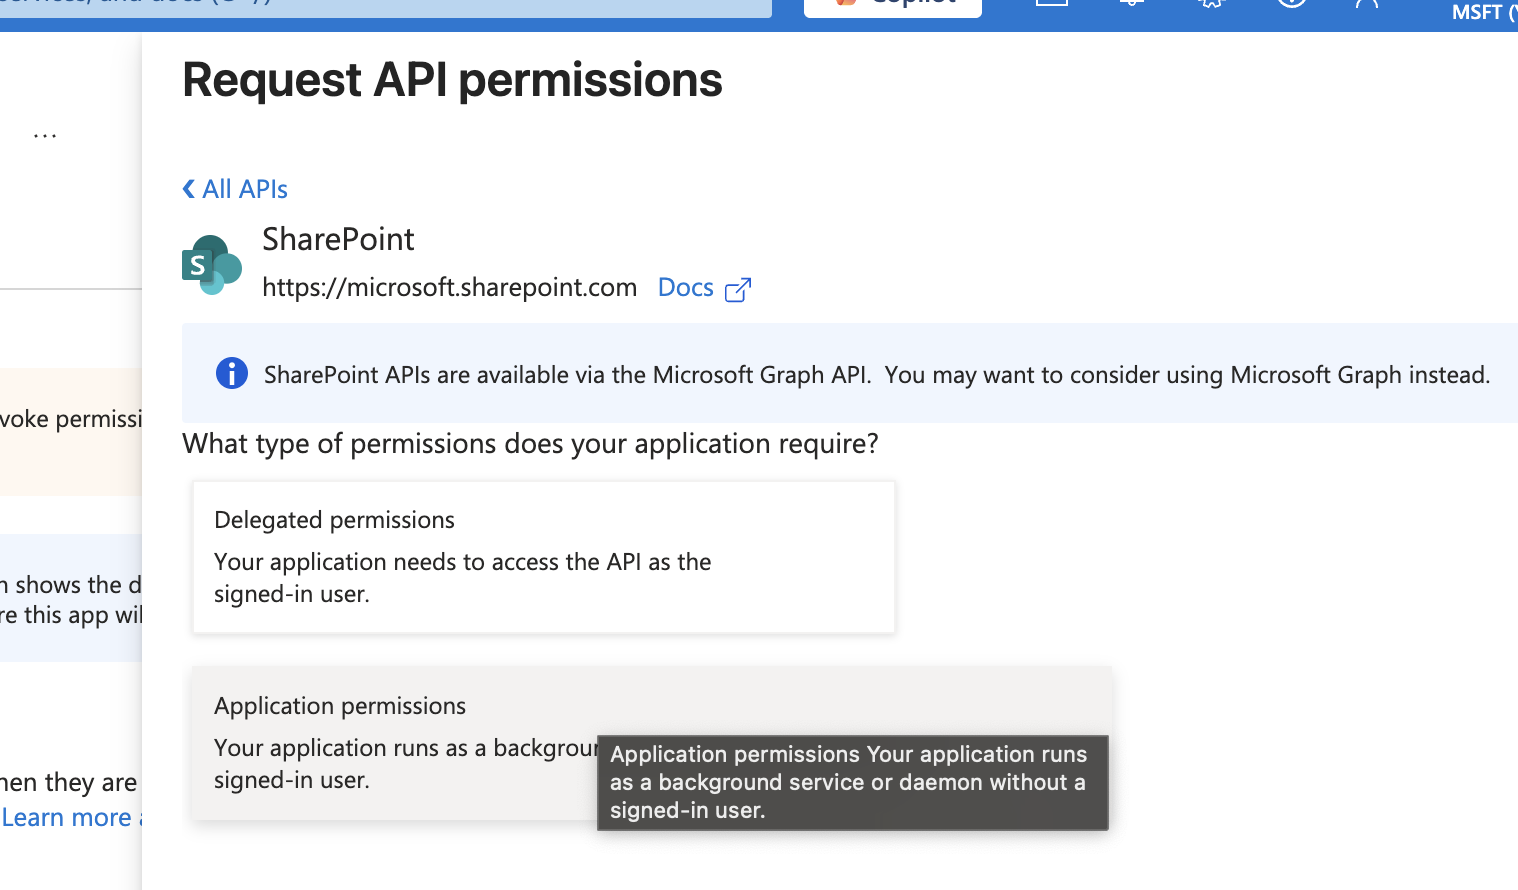
16. Required for incremental permission sync (SharePoint connector only)
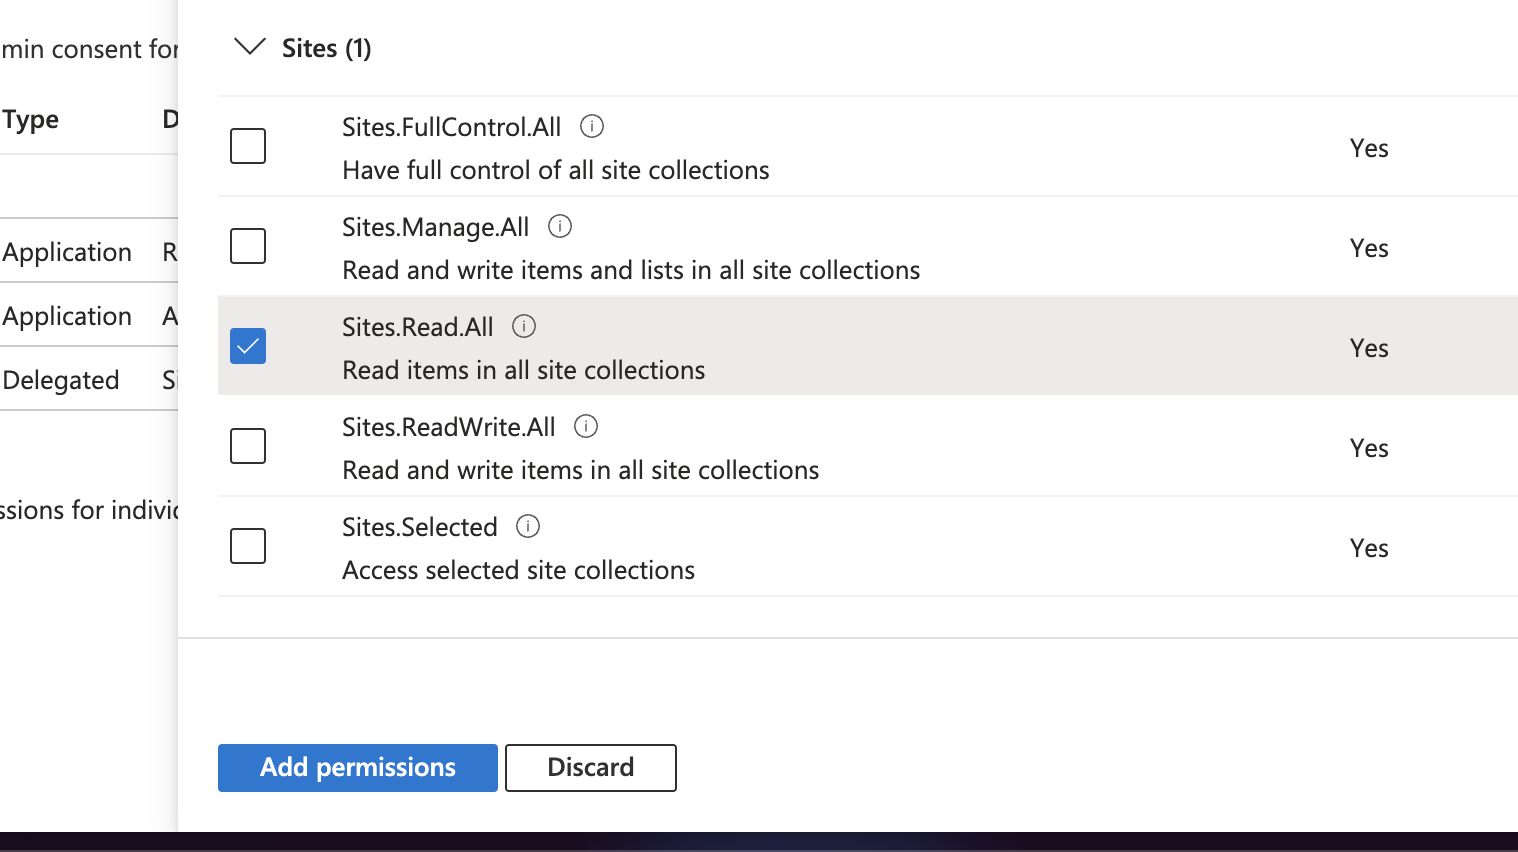
To enable incremental permission detection (detecting when document permissions change without re-crawling all documents), add the Sites.Read.All permission for the SharePoint application:
16.1. Click on Add a permission
16.2. Select SharePoint (not Microsoft Graph)
16.3. Select Application permissions
16.4. Select Sites.Read.All and click Add permissions
Note: Incremental permission detection is not available when using client secret authentication (app-only tokens). Use certificate-based authentication (recommended) or ROPC for full incremental support.
For incremental permission sync with Sites.Selected, add the SharePoint Sites.Selected permission instead.
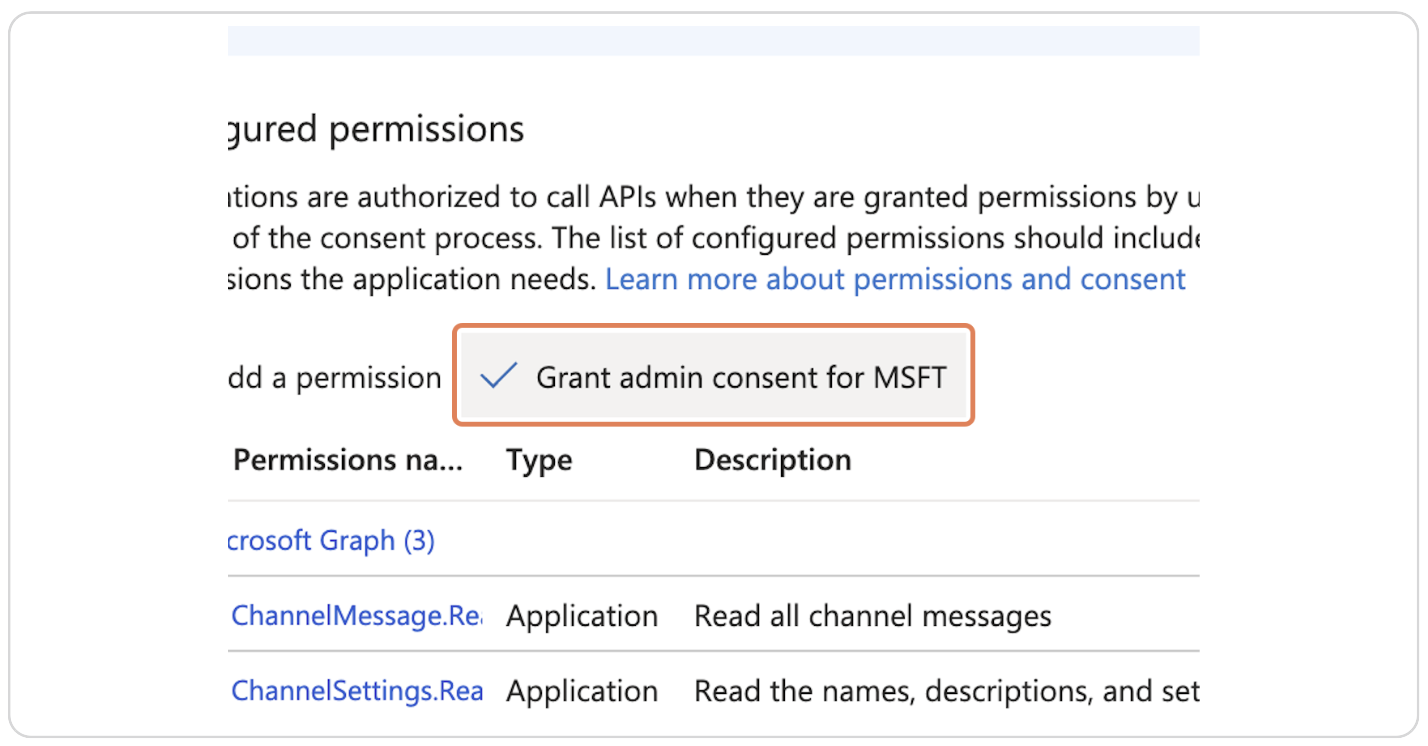
17. Click on Grant admin consent for MSFT
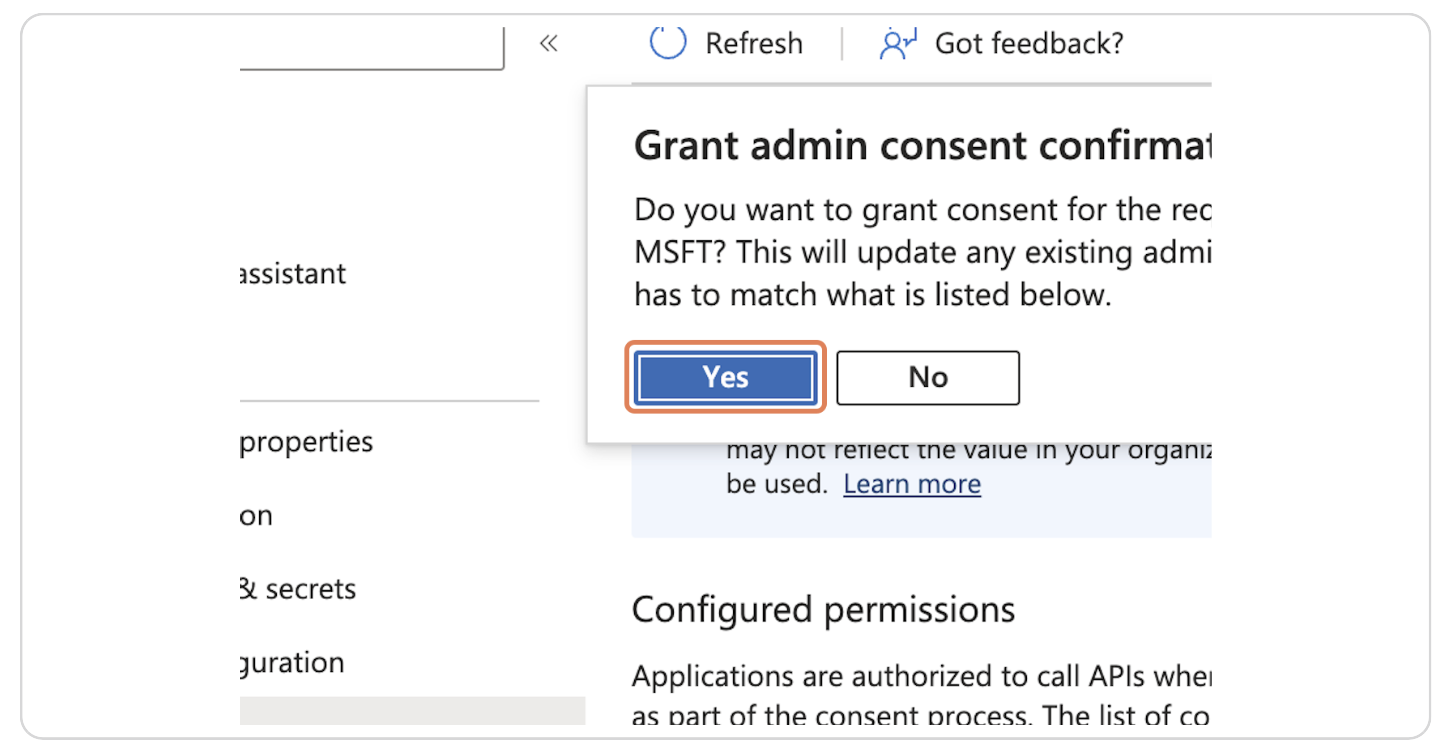
18. Click on Yes
19. (Required only for "Sites.Selected" permissions) Grant Read permissions to the specific sites
This step is required only if you selected the "Sites.Selected" permission in step 15, otherwise skip to step 20.
Identify the Site ID of the SharePoint site you want to grant access to.
You can find the Site ID in the SharePoint admin center or by using the Microsoft Graph Explorer. Common queries to get the Site ID and WebUrl are:
- Get All sites:
GET https://graph.microsoft.com/v1.0/sites/microsoft.graph.getAllSites()
- Get root site:
GET https://graph.microsoft.com/v1.0/sites/root
- Get Sites at root level:
GET https://graph.microsoft.com/v1.0/sites/root/sites
- Get user's OneDrive WebUrl:
GET https://graph.microsoft.com/v1.0/users/{userPrincipalName}/drive/root/site
- Get Site by WebUrl:
GET https://graph.microsoft.com/v1.0/sites/{hostname}:/sites/{site-path}
SiteId should look like this:
contoso.sharepoint.com,12345678-90ab-cdef-1234-567890abcdef,abcdef12-3456-7890-abcd-ef1234567890
Also take note of the WebUrl of the site, you will need it to configure the connector later.
Once you have the Site ID, use the following command in Microsoft Graph Explorer or any HTTP client to grant read permissions to the application:
POST https://graph.microsoft.com/v1.0/sites/{siteId}/permissions
Content-Type: application/json
{
  "roles": ["read"],
  "grantedToV2": {
    "application": {
      "id": "{Connector applicationID}",
      "displayName": "{Connector Name}"
    }
  }
}
Replace {siteId} with the actual Site ID of the SharePoint site, {Connector applicationID} with the Application (client) ID (step 23), and {Connector Name} with the name from step 5.
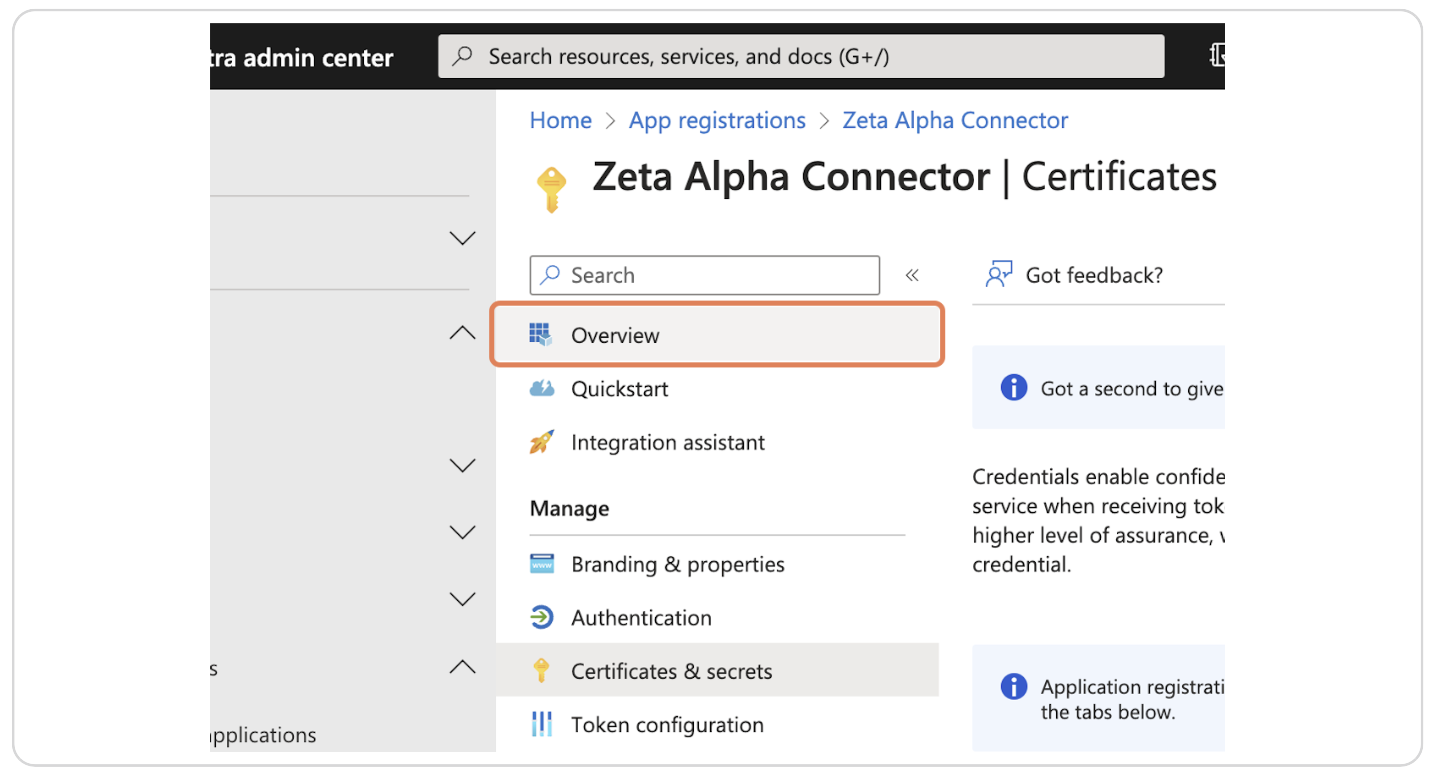
20. Click on Certificates & secrets

21. Choose your authentication method
You can authenticate using either a certificate (recommended) or a client secret (simpler but limited). Choose one of the two options below.
Recommendation: Certificate-based authentication is strongly preferred for the SharePoint connector because it supports incremental permission detection (detecting permission changes without re-crawling). Client secret authentication uses app-only tokens that are not supported by the SharePoint
getchangesREST API, requiring a slower full access rights crawl instead.
Option A: Certificate (recommended)
Certificate-based authentication is considered more secure and does not have an expiration time. It also enables all connector features including incremental permission sync.
Generate a self-signed certificate (if you don't already have one):
openssl req -x509 -newkey rsa:2048 -keyout sp_key.pem -out sp_cert.pem -days 365 -nodes \
  -subj "/CN=SharePoint App-Only Auth/O=Self-Signed"
This creates two files:
sp_key.pem— the private key (keep this secret, provide it to Zeta Alpha)sp_cert.pem— the public certificate (upload to Azure AD)
Upload the certificate to Azure AD:
- On the Certificates & secrets page, click the Certificates tab
- Click Upload certificate
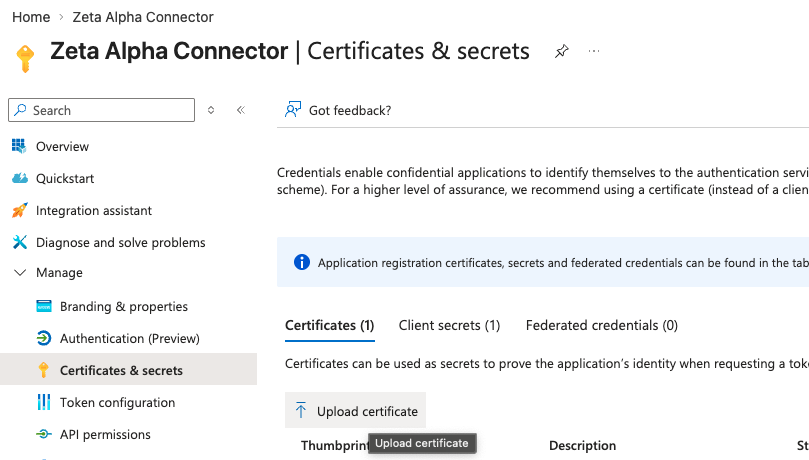
- Select the
sp_cert.pemfile and click Add
Option B: Client Secret (limited)
Note: Client secret authentication does not support incremental permission detection. The connector will perform a full access rights crawl on every update cycle, which is slower and uses more API requests.
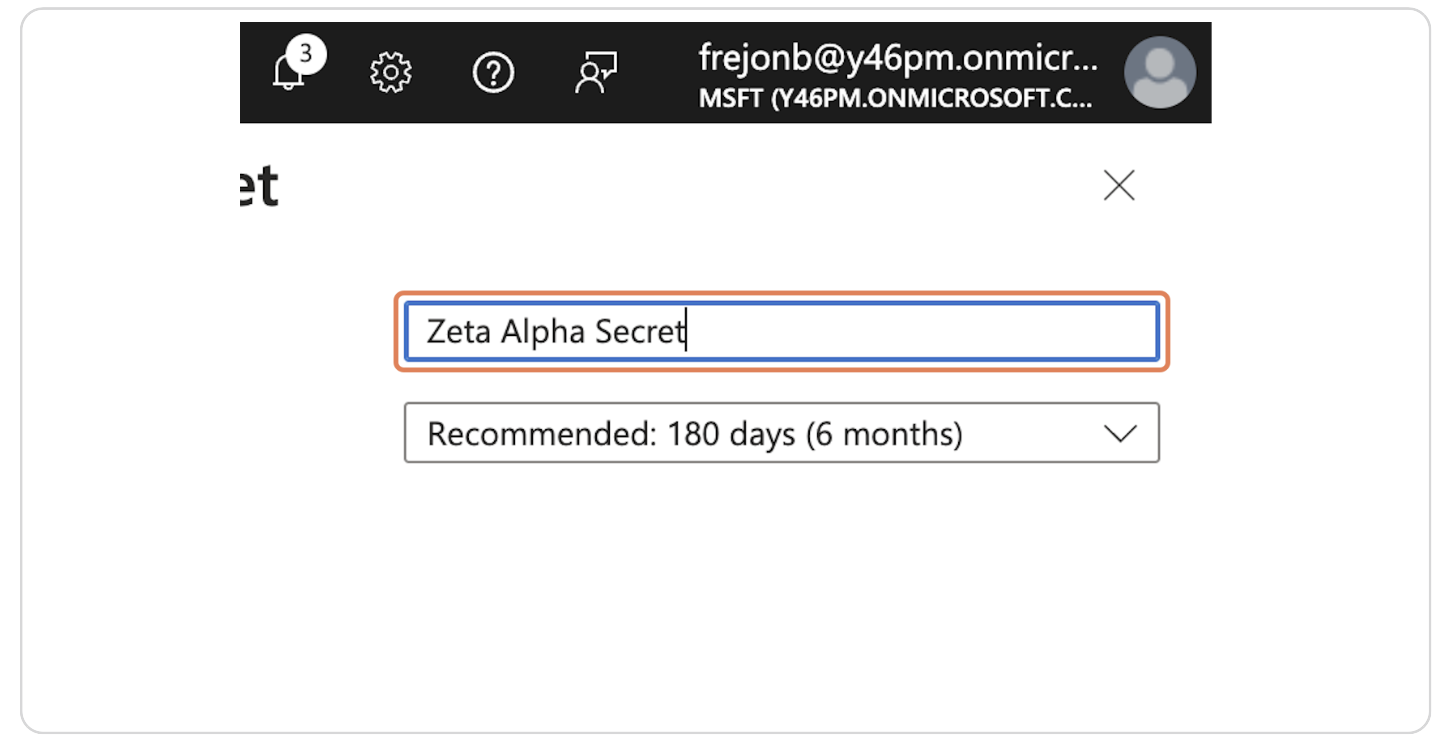
21b. Click on New client secret

22b. Type the name of the secret
For example "Zeta Alpha Secret"
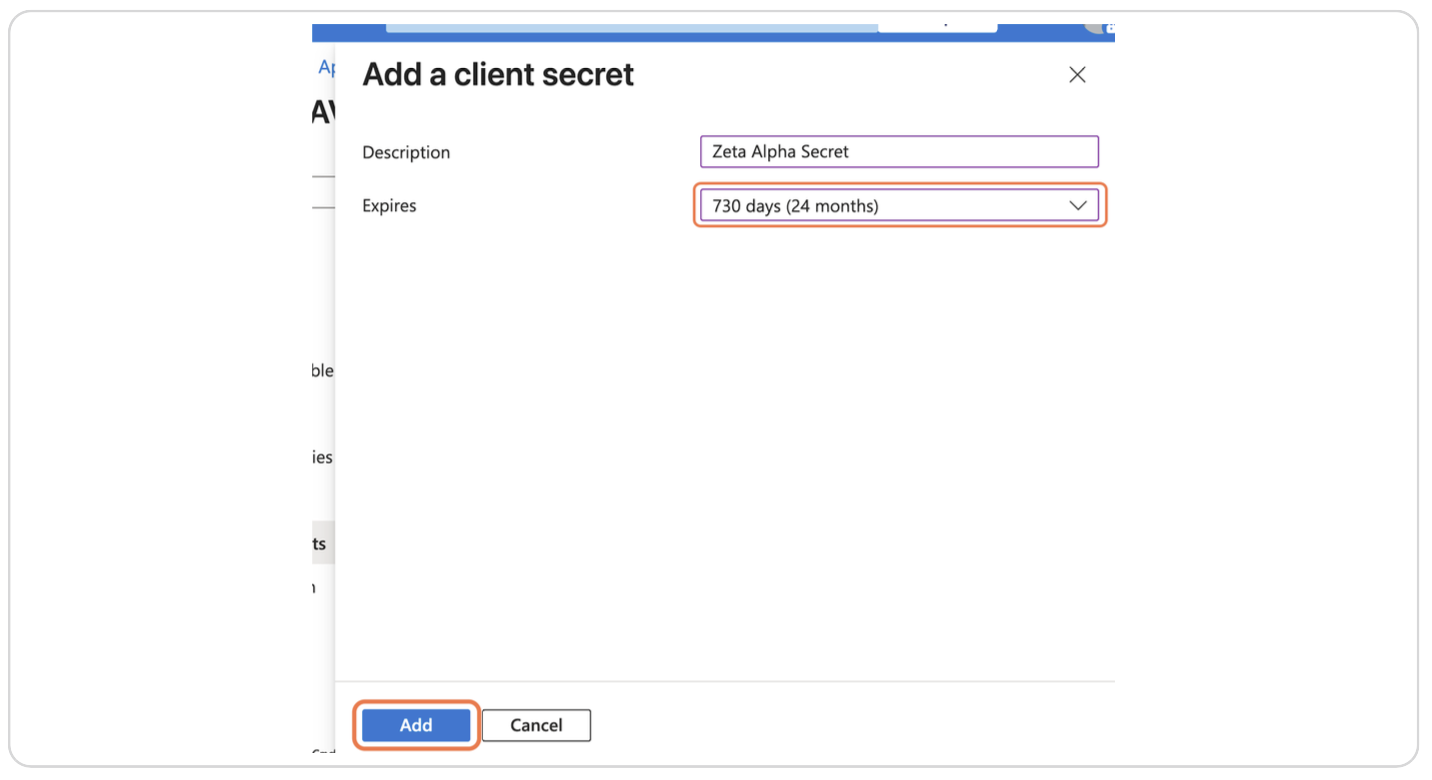
23b. Select the maximum expiration date and click on Add
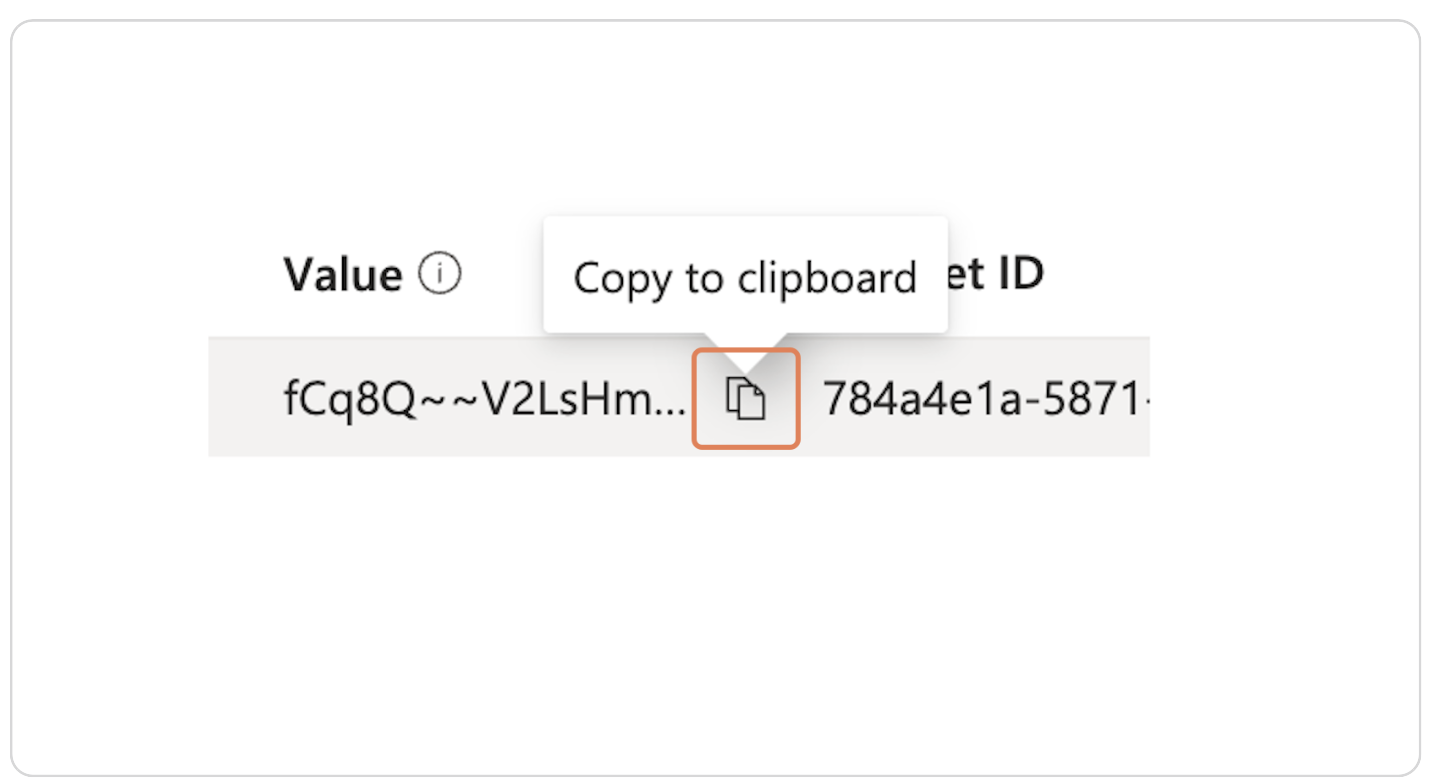
24b. Click on the Copy to clipboard button
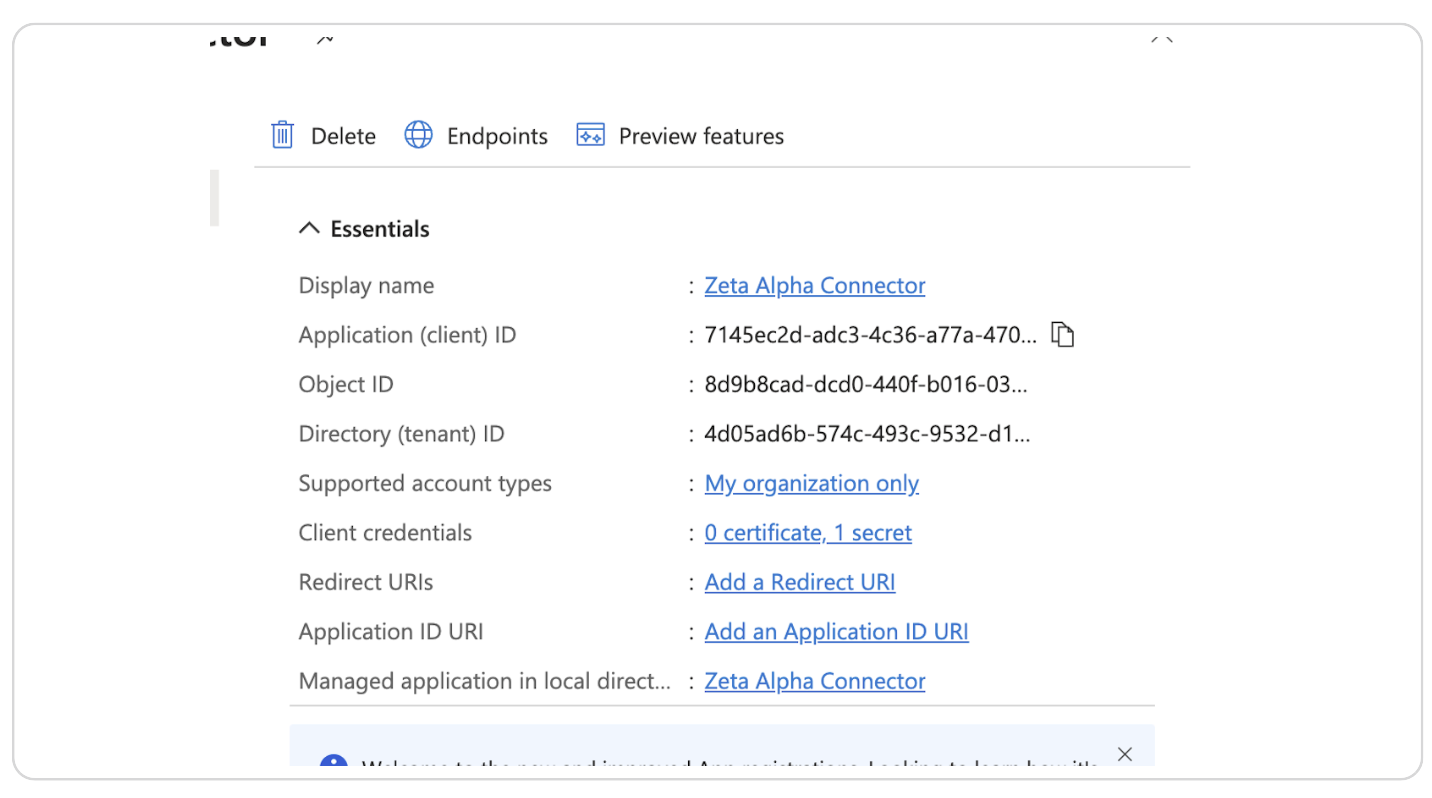
22. Click on Overview
23. Copy the values of Application (client) ID and Directory (tenant) ID
24. Send info to Zeta Alpha
The following values need to be sent to the Zeta Alpha platform
If using a certificate (Option A, recommended):
- Certificate private key (
sp_key.pem) - Certificate public key (
sp_cert.pem) - Application (client) ID
- Directory (tenant) ID
If using a client secret (Option B):
- Client Secret
- Application (client) ID
- Directory (tenant) ID
In case Zeta Alpha is managing your Sharepoint connector, please also send the list of SharePoint Site URLs (WebUrl) that you want to crawl.
What's next?
If applicable, set up the Zeta Alpha Teams and SharePoint connectors!