Create a Azure DevOps Connector
A Azure DevOps connector enables you to ingest data from your Azure DevOps instance into the Zeta Alpha platform. This guide shows you how to create and configure a Azure DevOps connector for your data ingestion workflows, including options that impact crawling performance.
Info: This guide presents an example configuration for a Azure DevOps connector. For a complete set of configuration options, see the Azure DevOps Connector Configuration Reference.
Prerequisites
Before you begin, ensure you have:
- Access to the Zeta Alpha Platform UI
- A tenant created
- An index created
- Azure DevOps credentials (refer to the tutorial Configure Azure DevOps Access for detailed instructions)
Step 1: Create the Azure DevOps Basic Configuration
To create a Azure DevOps connector, define a configuration file with the following basic fields:
is_document_owner: (boolean) Indicates whether this connector "owns" the crawled documents. When set totrue, other connectors cannot crawl the same documents.schedule: (string, optional) The schedule to crawl the Azure DevOps instance (cron format).content_source_name: (string) The name that identifies the content source in the index.personal_access_token: (string) The token used to access Azure DevOps.logo_url: (string, optional) The URL of a logo to display on document cards when no image is extracted from the pipeline.organization_url(string, required) The URL for your Azure DevOps organization (e.g. https://dev.azure.com/MyOrg)project:project_name: (string) The name of the Azure DevOps project to crawl.allowed_repositories: (array of strings) List of the repositories to crawl inside the project.
Example Configuration
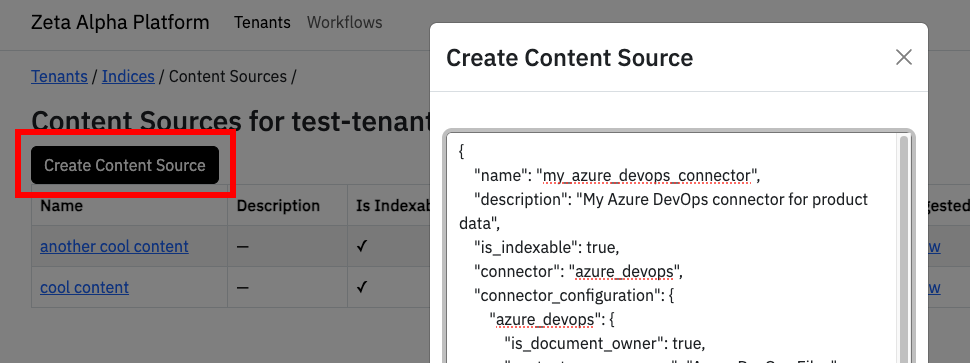
Here is an example of a basic Azure DevOps connector configuration:
{
    "name": "my_azure_devops_connector",
    "description": "My Azure DevOps connector for product data",
    "is_indexable": true,
    "connector": "azure_devops",
    "connector_configuration": {
        "azure_devops": {
            "is_document_owner": true,
            "content_source_name": "Azure DevOps Files",
            "organization_url": "https://dev.azure.com/MyOrg",
            "personal_access_token": "my_access_token",
            "logo_url": "https://mycompany.com/logo.png",
            "project": {
                "project_name": "MyNewProject",
                "allowed_repositories": ["repo_a", "repo_b"]
            }
        }
    }
}
Step 2: Add Field Mapping Configuration
When crawling Azure DevOps, the connector extracts document metadata and content as described in the Azure DevOps Connector Configuration Reference. You can map these Azure DevOps fields to your index fields using the field_mappings configuration.
Example Field Mappings
The following example shows field mappings for the default index fields:
{
    ...
    "connector_configuration": {
        "azure_devops": {
            ...
            "field_mappings": [
                {
                    "content_source_field_name": "title",
                    "index_field_name": "DCMI.title"
                },
                {
                    "content_source_field_name": "last_updated_at",
                    "index_field_name": "DCMI.modified"
                },
                {
                    "content_source_field_name": "created_date_time",
                    "index_field_name": "DCMI.created"
                },
                {
                    "content_source_field_name": "author",
                    "index_field_name": "DCMI.creator",
                    "inner_field_mappings": [
                        {
                            "content_source_field_name": "display_name",
                            "index_field_name": "full_name"
                        },
                        {
                            "content_source_field_name": "display_name",
                            "index_field_name": "Ontology_ID"
                        }
                    ]
                },
                {
                    "content_source_field_name": "content_source_name",
                    "index_field_name": "DCMI.source"
                }
            ],
            ...
        }
        ...
    }
}
Step 3: Specify What to Crawl
You can configure the Azure DevOps connector to crawl specific content from your Azure DevOps instance. While a full crawl is possible, we recommend specifying what to crawl to avoid unnecessary data and improve performance.
Available Configuration Options
path_include_regex_patterns: (array of strings, optional) Regular expressions to match specific file paths to crawl.path_exclude_regex_patterns: (array of strings, optional) Regular expressions to exclude specific file paths from the crawl.
These values are configured under the content_configuration > repository_files (see example below).
Example Configurations
Example: Crawl specific information in repo
{
    "name": "my_azure_devops_connector",
    "description": "My Azure DevOps connector for product data",
    "is_indexable": true,
    "connector": "azure_devops",
    "connector_configuration": {
        "azure_devops": {
            "is_document_owner": true,
            "content_source_name": "Azure DevOps Files",
            "personal_access_token": "my_access_token",
            "logo_url": "https://mycompany.com/logo.png",
            "project": {
                "project_name": "MyNewProject",
                "allowed_repositories": ["repo_a", "repo_b"]
            },
            "content_configuration": {
                "repository_files": {
                    "path_include_regex_patterns": [".*\\.md$"],
                    "path_exclude_regex_patterns": ["src/.*"]
                }
            }
        }
    }
}
This example will only crawl .md files, and skip the src directory.
Step 4: Create the Azure DevOps Connector
To create your Azure DevOps connector in the Zeta Alpha Platform UI:
- Navigate to your tenant and click View next to your target index
- Click View under Content Sources for the index
- Click Create Content Source
- Paste your JSON configuration
- Click Submit