Managing Agents in the Platform
After deploying an agent (see Deploying Agents), you manage it through the Platform Admin UI. This tutorial walks you through creating an agent setup, configuring its capabilities, and assigning it to a surface in the Navigator.
Prerequisites
- Admin access to the Zeta Alpha Platform Admin
- At least one LLM configuration in the tenant (set up under Tenant > Edit > LLM Configurations)
- An agent available in the platform (either a built-in agent like
agentor a deployed agent likemy-project:my_agent)
Step 1: View Existing Agents
Open the tenant in Platform Admin. The Agent & LLM Overview section at the bottom lists all configured agents with their LLM model, tracing status, and where they are used.
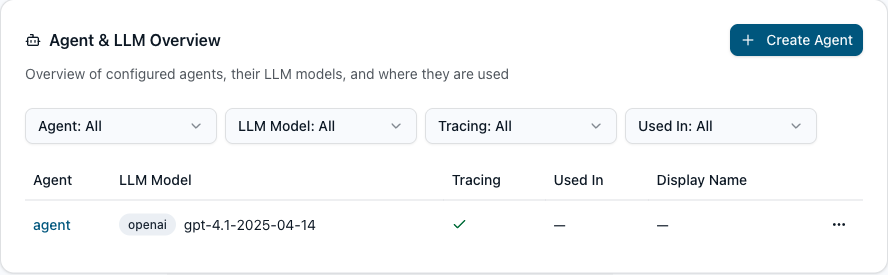
Click Create Agent to add a new one, or click an agent name to view its details.
Step 2: Create or Edit an Agent
The agent form has two modes: Form (structured fields) and JSON (raw editor for the full chat_bot_setups entry).
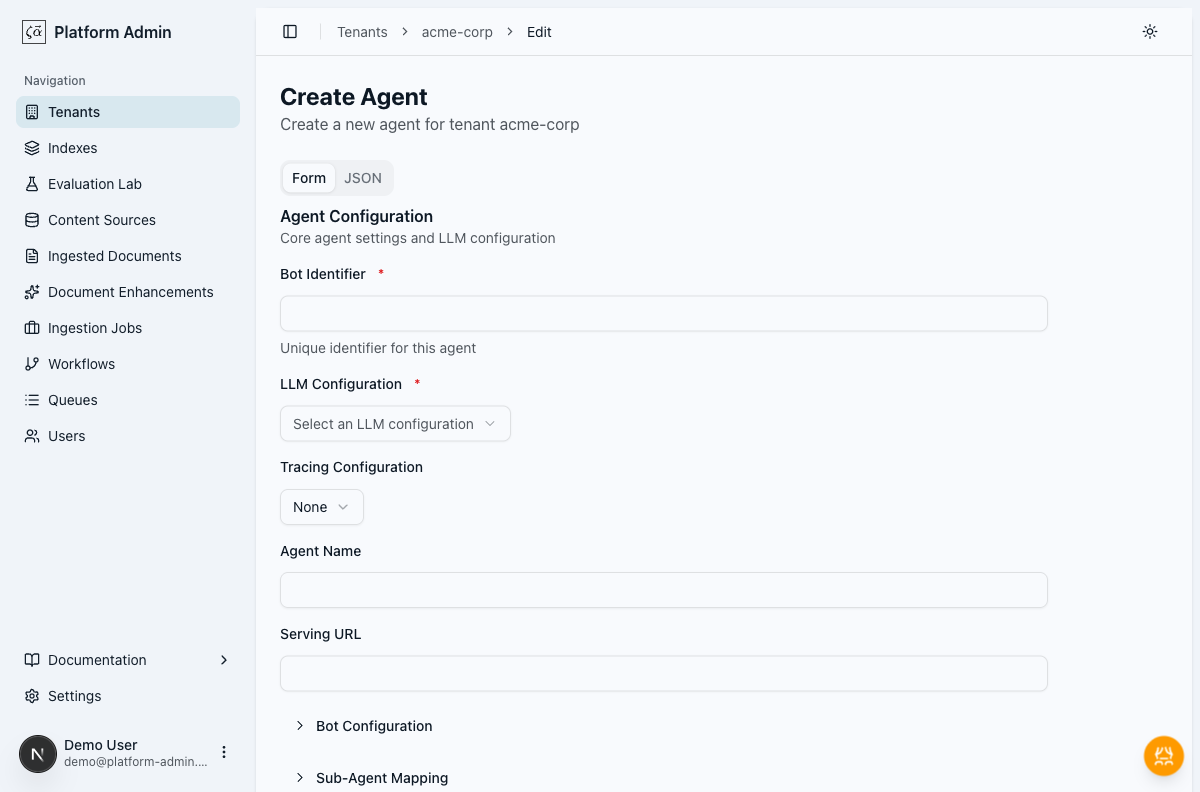
Fill in the fields:
| Field | Description |
|---|---|
| Bot Identifier | Unique name for this agent setup. This is what you pass as agent_identifier in API calls. |
| LLM Configuration | Select from the tenant's configured LLM providers. |
| Tracing Configuration | Optional. Select a tracing configuration (e.g. Langfuse) for observability. |
| Agent Name | The agent to run. Use agent for the built-in harness, or a deployed agent name like my-project:my_agent. |
| Serving URL | Where the agent is served. Pre-filled automatically — leave as-is unless you have a custom deployment. |
| Bot Configuration | The agent's capability configuration (tools, skills, memory, etc.). This mirrors agent_configuration in a local agent_setups.json. See the Agent Configuration Reference for the full JSON schema. |
After running za agents deploy upload, the CLI generates a build/<agent-name>.json file for each agent. This file contains the values for bot_identifier, agent_name, and bot_configuration — use them to fill in the form fields above.
Step 3: Review Agent Details
Click an agent in the overview table to see its full configuration:
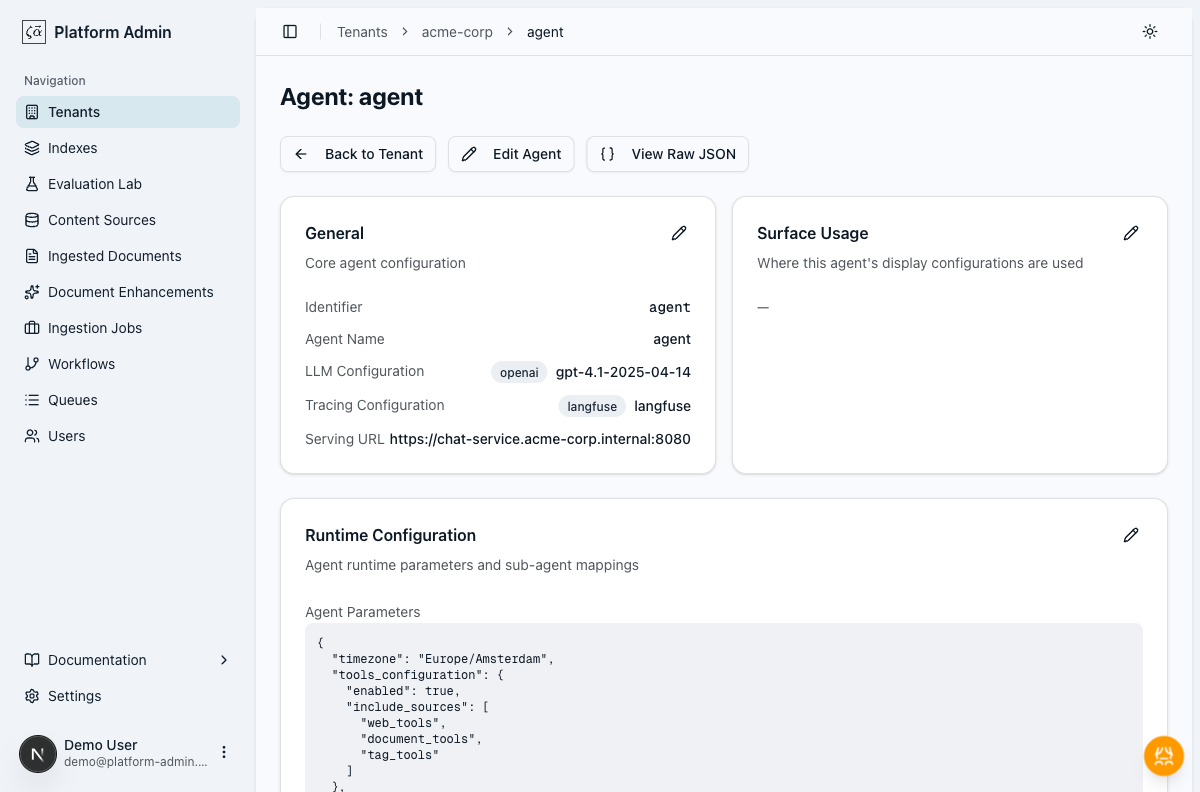
The detail page shows:
- General: identifier, agent name, LLM and tracing configuration, serving URL
- Surface Usage: which Navigator surfaces reference this agent
- Runtime Configuration: the bot configuration JSON and sub-agent mappings
- Display Configurations: how this agent appears on each surface
Step 4: Assign the Agent to a Surface
To make the agent available in the Navigator UI, go to Tenant > Edit > Client Settings and expand Agent Placement.
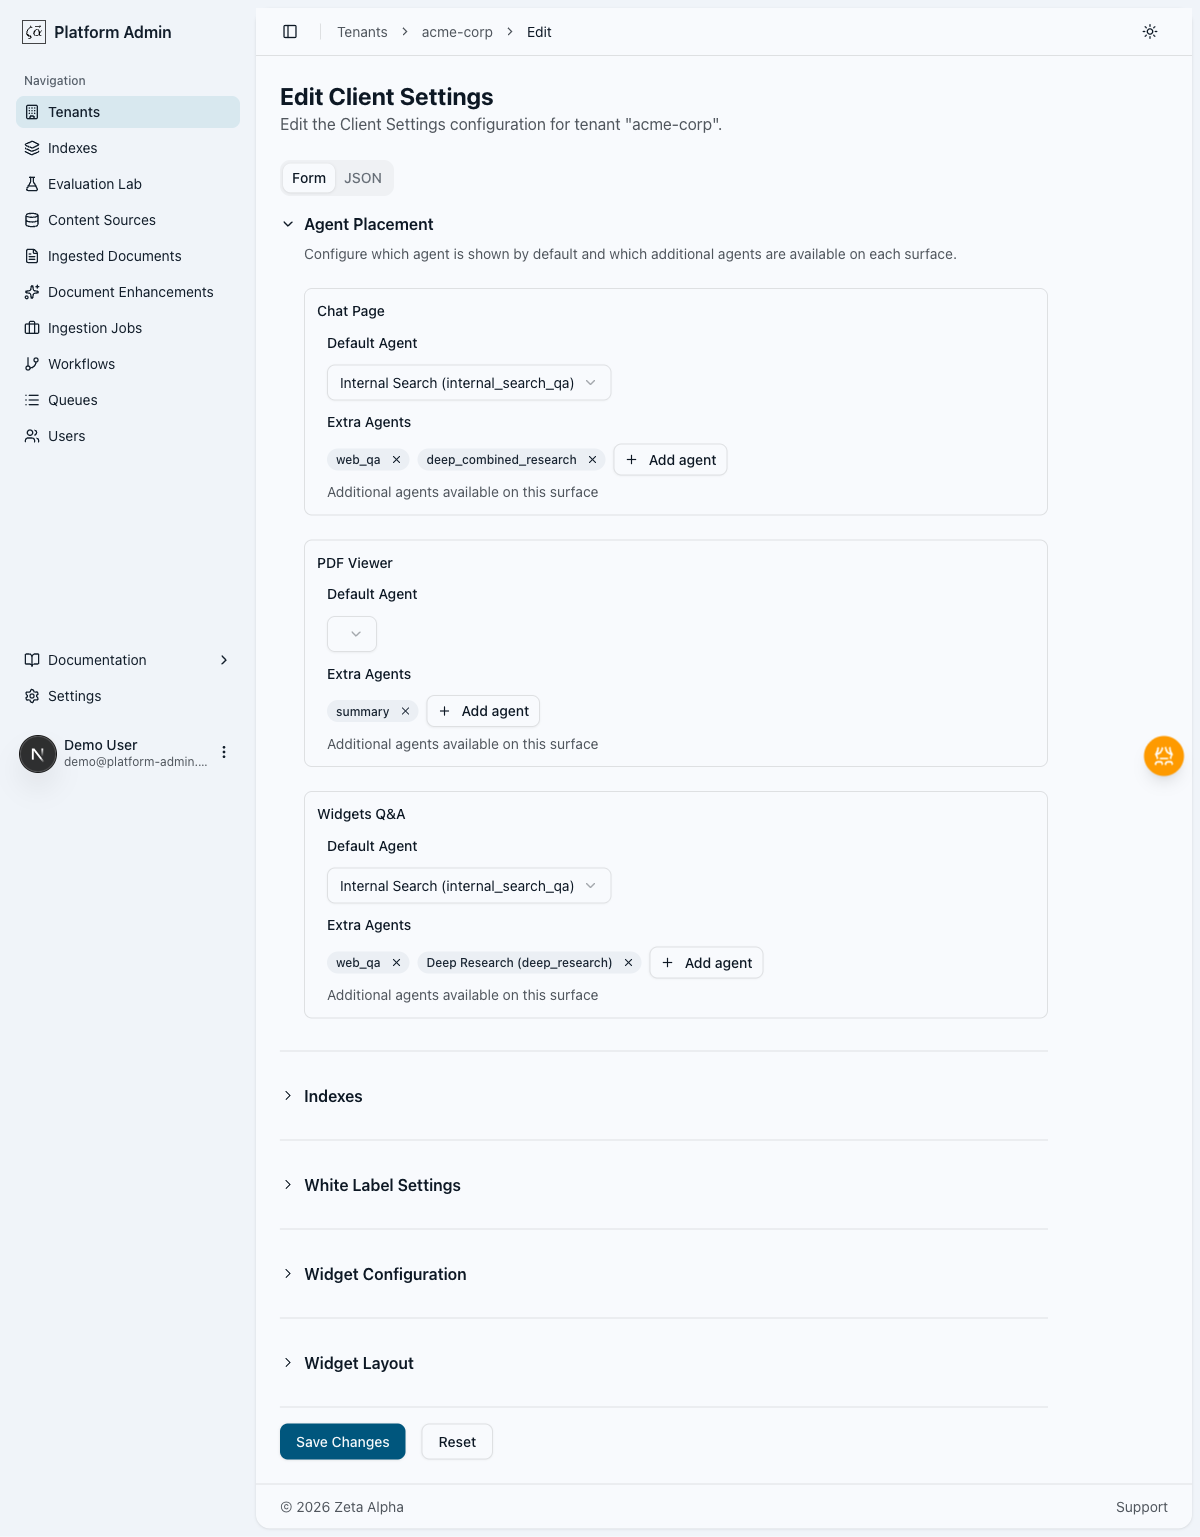
Each surface (Chat Page, PDF Viewer, Widgets Q&A) has:
- Default Agent: the agent shown by default when a user opens the surface
- Extra Agents: additional agents the user can switch to
Select your agent from the dropdowns. Click Save Changes.
Changes to tenant settings may take up to 1 minute to appear in the Navigator.
Next Steps
Your agent is now live in the Navigator. You can also call it programmatically — see Getting Started with the Chat API for details.